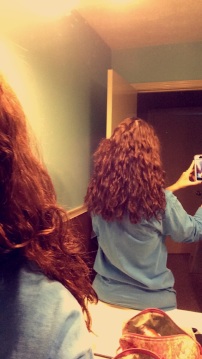
“That’s why her hair is so big, it’s full of secrets.”
Last week, I got a spiral perm! It was a big step for me, making such a lasting change to my hair considering I can barely commit to a slight color change. In reality, perms are not nearly as scary as my friends and family made them out to be! I love my newfound curls, but I am SO happy I did thorough research before going into the salon to ensure that I got the best results possible.
Why did I get a perm?
A little less than a decade ago, my hair was crazy curly. Like the kind of just washed curls that don’t need any attention to look flawless for the day. The older I got, however, the less curly my natural hair seemed to be, and the more work I needed to put into it to make it appear curly. After trying a wide assortment of products and tools, I resorted to using the Conair You-Curl wand to achieve my desired curly locks. After weighing my options for quite some time, I decided to get a perm to avoid having to style my hair everyday. Furthermore, I am going to be traveling quite a bit this summer, mainly to humid regions and beaches, and I don’t want to have to worry about my hair while I’m gone. I decided that a perm, if it worked out the way I envisioned, would be my best bet for neat-looking, easily managed curly hair.
Why was I a good candidate for a perm?
Honestly, my hair wasn’t in that great of shape before I got my perm. After watching numerous YouTube videos, reading countless articles, and listening to perm horror stories, I was convinced a perm would not be good for my hair. A consultation with my stylist, however, changed my initial conclusions. Because my hair has not been colored recently, I’ve never bleached it, and the only dye I’ve ever used on it is semi-permanent box color, my hair could withhold a perm. Ultimately, my stylist explained that the chemicals in a perm are no more damaging to your hair than a color treatment if you wash, condition, and use heat-protection products. Because of the scary stories I’d heard of people’s hair breaking off at the root after a perm, I opted to get a Keratinplex treatment on my hair first (deep conditioning) that made it smooth and super healthy by adding protein and moisture to my hair. With this, I took the plunge and scheduled my perm.
The Process and Results
So, against better judgment, I scheduled my perm at the local beauty school. I know everything in the world says to schedule with a trained professional, but I couldn’t turn down the price. (only $30!) It took quite a bit longer than I imagine someone who has done perms for years would take, but I was comfortable because supervisors were constantly checking in on the process. 36 hours prior to my perm, I did not wash, condition, or use any heat on my hair to make sure it was in the most natural state possible to ensure that the perm would take. I took in pictures of what I wanted my hair to look like, very curly but not tight curls, and explained in detail to my stylist what I envisioned. She decided that a spiral perm would be best for me according to how I had explained myself and used lavender rods all over my head. The entire process took about three hours and unfortunately, I did get a small chemical burn on my neck from the perming lotion that dripped off a rod. Overall, however, I was so thrilled when she took out the rods and immediately I saw curls! I was instructed to not wash my hair for 48 hours after the perm treatment, but I only waited about 38 because I couldn’t take it any longer. I was so scared that when I washed out my hair, the curls would go with it, but the second I stepped out of the shower, I saw the curls yet again. A week later, I’m still in love with how consistent my hair curls and looks so incredibly natural. After showering, I use a little bit of John Freida Frizz-Ease mousse and a dab a Garnier Fructis Curl Shaping gel and I can go all day with frizz-free air-dried hair. See photos below of how my spiral perm turned out!


