Rome wasn’t built in a day, and neither was your cooler! So this is Take Two on Fraternity Cooler Painting 101. It’s been almost two years since my first attempt, and I’ve learned quite a bit since then! The cooler I’m working on today is not associated with a fraternity, but still requires the same process. The following post outlines how to paint a cooler from start to finish. Please do not hesitate to comment with questions! Happy cooler painting!
Materials:
- Cooler
- Sand paper/sander
- Primer spray paint (If you want!)
- Mod Podge (I used matte finish as well as glitter)
- Weatherproofing sealant
- Pencil
- Sharpies (Fine point and regular)
- Paint pens – Black, Silver
- Acrylic paint, many colors
- Stencils, Printed images
Project Duration:
In total, this project took three weeks to complete. I probably spent around 15 hours total painting and the rest of the time was left for the sides of the cooler to dry.
Step One: Purchasing Your Cooler
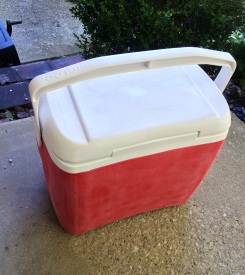
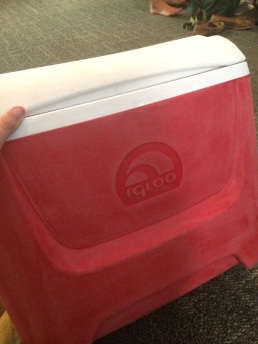
The recipient of your cooler may specify the style of cooler he/she prefers, especially if your date already has one. Your options include large and small sizes, coolers with wheels and those without, as well as round coolers and those with drains. For this cooler, I elected to use a standard Igloo cooler without wheels and a non-removable lid with handles. The one I purchased from Wal-Mart was an Igloo 48-Quart Breeze Ice Chest and retailed at $18.87, not too bad! See the cooler listing on Wal-Mart’s site here.
Ultimately, it’s your call which style of cooler to use. I have found that wheels are difficult to paint and often result in your hard work chipping off very easily as it is dragged around. Round coolers are also unique but they limit the types of things that can be kept in the coolers as well as the room for design you have. This cooler proved slightly challenging to paint because of the over the top handle — just be careful when moving the cooler side to side to avoid getting it in wet paint, or chipping around the hinges.
Step Two: Choosing Design
How well do you know your cooler recipient? I was comfortable choosing designs that I knew my recipient would like because I know him very well. If you are going with a friend or someone you don’t know well to a formal, ask them! This is your special gift to them since they are taking you on an amazing trip so make sure you pick things they like!
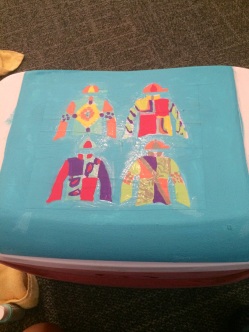
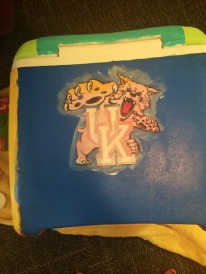
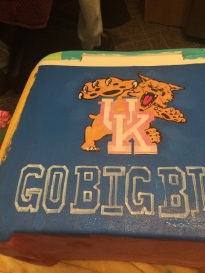
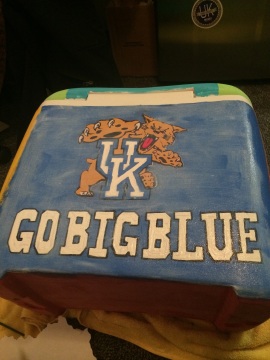
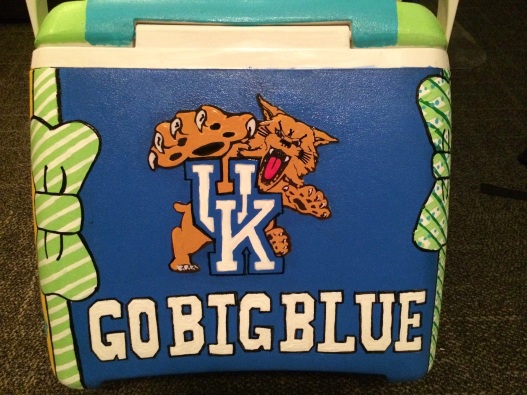
At this point, I selected a color scheme before choosing the images I wanted to put on my cooler. I used acrylic paint I already had as well as purchased some new colors that I know he likes. Next, I printed out images of some of his favorite things including horse jockey silks and the University of Kentucky Wildcat. If you are comfortable drawing these images and icons freehanded, be my guest. Generally, I printed the images I wanted to use on regular printer paper and cut them out to be mod-podged onto the cooler’s surface later.
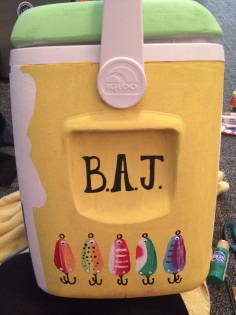
While you’re free to choose whatever design you think your date would like, I would reserve space on the cooler for your cooler recipient’s name and the event for which they are receiving the cooler i.e. a fraternity formal. These items are extremely special to fraternity boys and they’ll appreciate having a token to remember this event. Other suggestions include his political party symbols, his favorite alcohol, beach scenes/sunsets, state flags, song lyrics, & much more!
Step Three: Getting Started
Before you begin painting, there are a few crucial measures you need to take before getting creative to ensure the durability of your cooler. First, use your sand paper and a sander (if accessible) to sand down all of the surfaces of the cooler you plan to paint. Sanding will help the painting adhere better to the plastic. Dust off the cooler before applying any paint because it will have dust from sanding. The first time around, I took my cooler outside and sprayed its entirety with a primer spray paint. I used Krylon White Gloss Fusion Spray Paint, 15 oz (purchased at Wal-Mart for around $4) because this product is specifically made for adhering to plastic and making the surface paintable and long-lasting. See it here. The sides of the cooler should be covered completely and let dry for at least 24 hours before the detail painting begins. **It was also really nice having a red cooler to begin with because you could easily see when you’d covered all of it with the primer.** This time, however, I did not prime my cooler because I sanded it very thoroughly and applied a thin coat of white acrylic paint over all of the surfaces. This worked just fine for priming the surface to hold paint — just depends on your space and personal preference!
Step Four: Detail Work
It’s finally time for the fun to begin! Painting the sides of the cooler is a tedious task because each has to be done one at a time to allow paint to dry. You can start with any side you like, I chose the top because it was a nice flat surface to begin with. I began by painting a solid layer of a background color all over the surface. I then added the image outline of jockey silks I wanted to use after the paint had dried using Mod Podge as the glue. I painted and sketched over the printed outline to make it look more hand drawn. Additionally, I free handed the bowties on the sides of the top. When the design was finished, I covered the entire side with another layer of Mod Podge and let dry over night. You CAN really have too much Mod Podge over your designs! Although, it will help seal your work and protect it from chipping off as acrylic paint tends to peel, just thin layers to avoid printed designs from bubbling and trapping air! I also recommend Mod Podging in a very well ventilated area – I did this entire project in my room and did not realize how bad the fumes were until I left! GO OUTSIDE! (Dorm rooms/apartments are not the best spaces for mod podging and spray painting!)
Continue to paint/paste your images onto the cooler, side by side, without forgetting to Mod Podge each side when it is completed. Be careful around the lid of your cooler, you don’t want the paint to seal it shut! If you have wheels as well, paint around them with caution so paint does not dry in them and prevent it from being rolled! Open the lid of your cooler before mod podging and spray painting — your paint with chip if it dries shut. I advise painting well onto the bottom side of the cooler as well because the thickness of the paint you are applying makes it more likely to chip and peel off and having the paint extend toward the bottom of the cooler gives you more protection. Because each side of your cooler will likely be a different color, you will need some way to connect the sides without them looking slopping. I opted to paint bowties onto the corners to hide the lines where the colors of each side meet. Bowties are a very common corner trick and very simple to do, I always freehand these – I have also seen golf balls, needlepoint belts, gold tees, beer bottles, and more.
Step Five: Finishing Touches
After you have painted all sides of the cooler to your liking, one last coat of Mod Podge won’t hurt anything. Previously, I also painted a cute saying on the bottom of the inside of the cooler that read, “If you can read this, call a pledge” as a fun way to spice up the white inside when you’re attending a fraternity formal. As a final sealant against weather, sand, or whatever else your cooler might encounter, spray your cooler entirely with Krylon Clear Matte Finish that can also be purchased at Wal-Mart for around $4.74. See the spray here. Once your cooler has dried completely, allow 24 hours at least, it’s ready to be given to its recipient!
